Step 1: Access WHM and Navigate to Exim Configuration
- Log in to WHM: Use your administrator credentials to log in to your WHM panel.
- Navigate to Exim Configuration Editor: Once logged in, search for “Exim Configuration Editor” in the search box or find it under the “Service Configuration” section.
Step 2: Access the Exim Advanced Editor
In the Exim Configuration Editor:
- Click on the “Advanced Editor” tab. This is where you can make detailed changes to your Exim configuration.
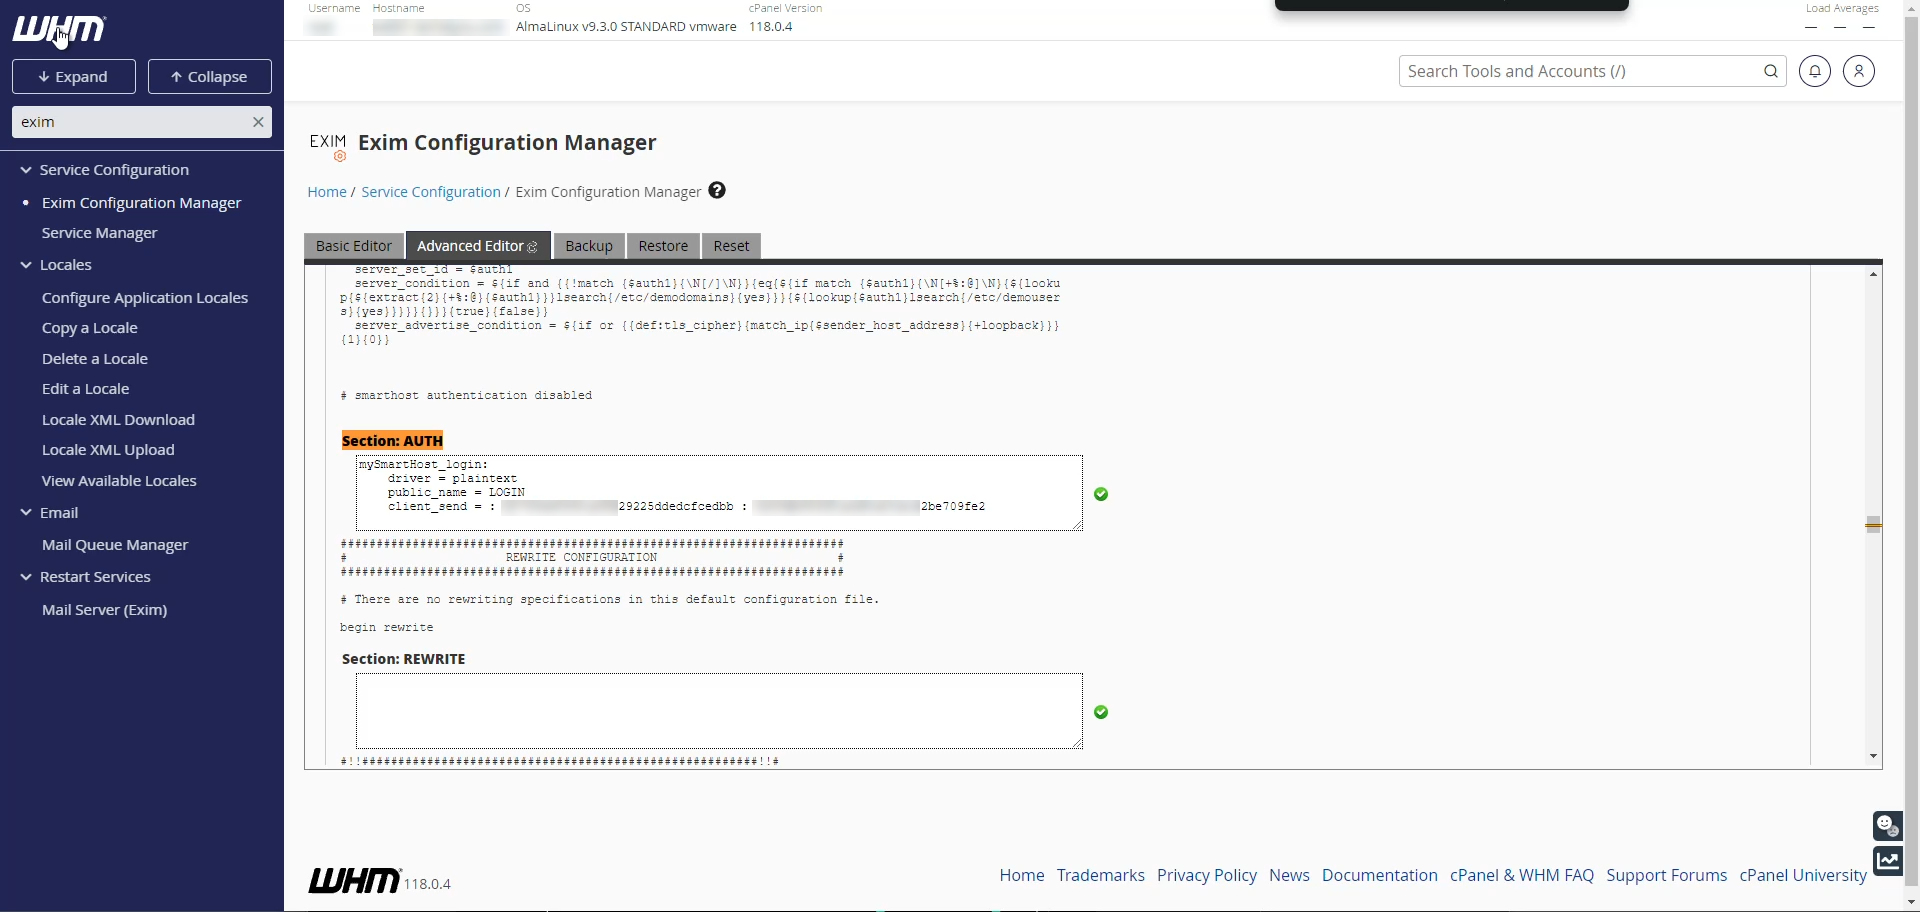
Step 3: Find the “Section: AUTH”
Using Browser’s Find Feature:
- Once in the Advanced Editor, you can quickly navigate through the dense configuration by using your browser’s find feature. Press
Ctrl + Fon Windows orCmd + Fon Mac and type “Section: AUTH” to jump directly to the relevant section.
Step 4: Configure Authentication
Configure AUTH Section:
- Under “Section: AUTH,” add the following details (ensure you replaced the “client_send” data with your own username and password or Secret Key/API info):
mySmartHost_login:
driver = plaintext
public_name = LOGIN
client_send = : aaaaaaaaaaaabbbbbcccccdddddddeeeeeee : aaaaaabbbbcccdddeeeffggg
Copy

Step 5: Define the Router
Using Browser’s Find Feature:
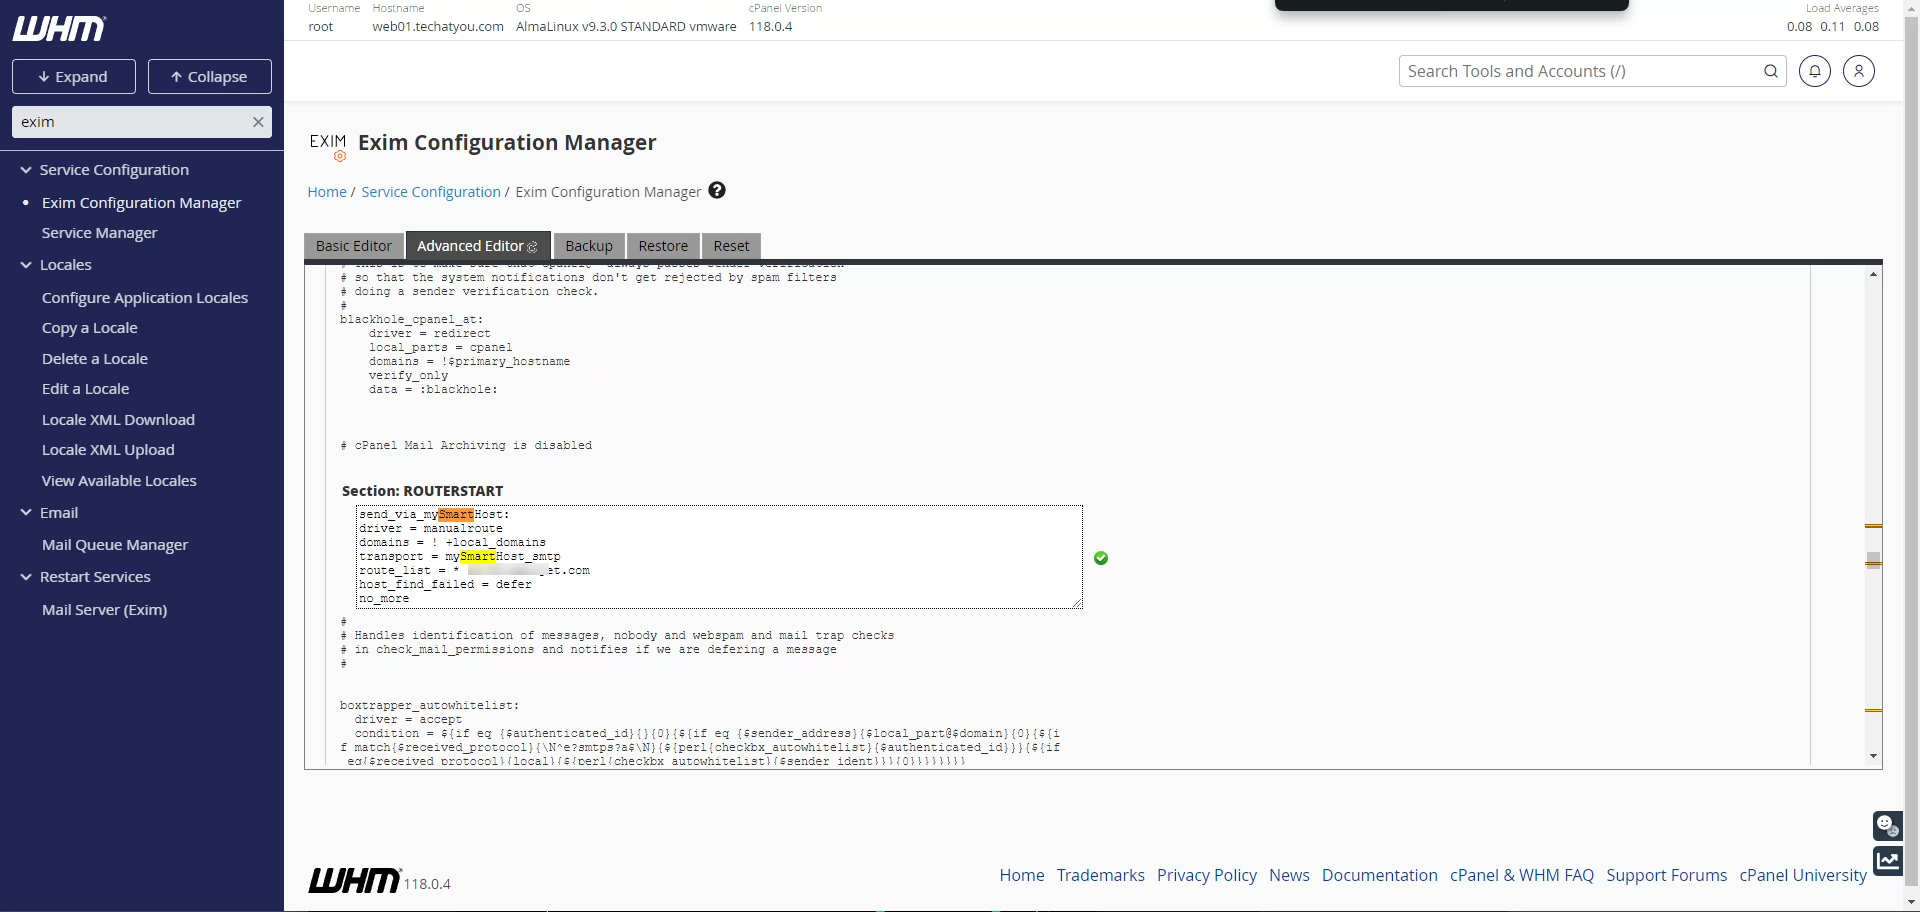
- Navigate to the “Section: ROUTERSTART” and add the following configuration (Make sure to replace “smtp.example.com” in the
route_list with your host.):
send_via_mySmartHost:
driver = manualroute
domains = ! +local_domains
transport = mySmartHost_smtp
route_list = * smtp.example.com
host_find_failed = defer
no_more
Copy

Step 6: Configure the Transport
Configure AUTH Section:
- Proceed to “Section: TRANSPORTSTART” and input the detials below (ensure you replaced the “Port = , hosts = “ data with your own, leave port as is if you do not know).
mySmartHost_smtp:
driver = smtp
port = 587
hosts = smtp.example.com
hosts_require_auth = <; $host_address
message_linelength_limit = 99999999
Copy
Step 7: Save Changes
Configure AUTH Section:
- Scroll down to the bottom of the page.
- Click “Save” to apply the changes.
Step 8: Test Configuration
Testing Outbound Email:
- Go to main WHM page > List Accounts > Click cPanel Logo to bring up account cPanel > Email Accounts > Create Email Account > Check Webmail > Compose and send a email to an outside email address e.g. gmail.com.


